


BULLDOG upgrade transformers for ribbon microphones from AMI-TAB-Funkenwerk!
These were designed to work with all of the styles of Chinese ribbons sold in the TNC Group Buy, but they will work with almost any ribbon microphone, and are better than anything else available.
These are a 1 to 42 step up, so they will work with almost every standard ribbon, new or old. Output is 200 Ohm with minimum load of 1k.
The TR42 is similar in design and idea to the one previously designed as the T58, but with the needed ratio, tuned to those particular ribbons. This one will have a bit of drive and "colouration" (whatever that is, choose your favourite colour...ours is MAUVE).
The x-formers have the same ratio, and can be installed with just four solder spots.
Price: $95/each. Fedex shipping is recommended...if you demand UPS or USPS, please contact us first to discuss.
PIX for MODDING:
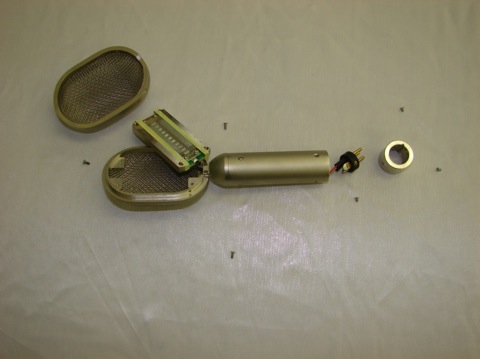
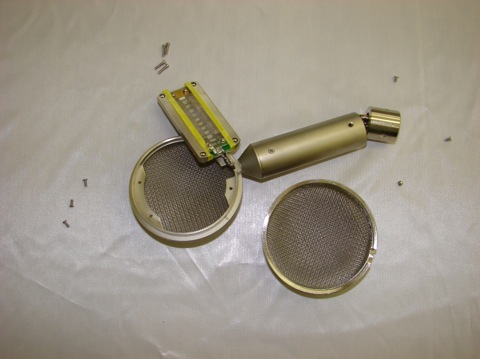
Disassembling the Chinese ribbon: first remove the three Philips screws that hold the XLR connector. With the connector lead in screw the metal ring can be separated. The head grill has three screws that hold it in place, and after removing those, the screen can be gently pulled off.
The actual ribbon element is secured with four screws; after the element is loose, the two existing x-former wires need to be unsoldered (some ribbons have both connections on one side, others have one on each side) so that the x-former can be pulled out of the body tube.
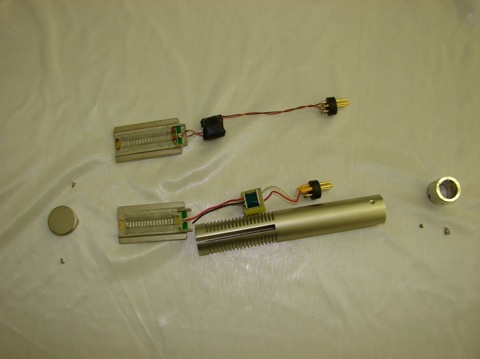
Before you pull it all out, a lead wire can be soldered to one of the (old) x-former wires - that will help to pull in the new wires. The black indication ring on one of the x-former wire goes to the ground lug of the element, the other clear one to the posive connection (right under the ribbon).
As soon the new wires are soldered properly, the element can be re-installed. On the step up side of the x-former, the black wire on TR22 and the white on TR42 go to pin 3 of the XLR connector; the red on both on TR22/42 goes to pin 2.
Same way of disassembling, but this ribbon has the connection on one side.
Here is the B&O copy. This element has the connections one of each side. First the three screws at the bottom have to be screwed out, then the XLR connector ring needs to be taken off, so the element as well as the x-former can be pulled out of the top. The top plug needs to be first loosened with the two screws, one on each side.
Installation is like the others, the wire with the black ring goes to the ground lug on the ribbon element, the clear one to the positive, the black wire (TR22) and the white (TR42) on the step up side go to pin 3, the red wire (TR22/42) to pin 2.
Put back together, plug the microphone into a V-78 or The Moonray, and prepare to be amazed!